The apple jelly is delicious as jam on bread, scones and even pork dishes. Yoghurt ice cream is delicious with a dollop of apple jelly added to it. Or serve it as you would an ordinary jelly to kids.

Part 1 : Extracting Apple Juice
Extracts about 6-7 cups juice
Ingredients
2kg sweet eating apples
1.5 liter (6 cups) water
grated rind of 1 lemon
Bag for straining
Method
1. Wash and roughly chop apples to smaller pieces. No need to peel or core.
2. Add apples, water and grated lemon rind into the pressure cooker.
3. Pressure cook for 10 minutes until soft and mushy. (With a normal pot this will take 25-30 minutes on gentle simmer).
4. Pour the mushed fruits into the bag and hang to strain out the juice. Leave overnight. Do not squeeze or you will get cloudy jelly.
5. You will end up with 6-7 cups of the strained juice.

Note :
My jelly bag is actually a 'ham bag' made of calico measuring roughly 20" x 14". Or use a new pillow case as a jelly bag.
Tip
Most people have a problem of where to hang a bag from. My jelly bag is fastened onto a wooden spoon and stuck underneath the microwave. A big pot sits on top of a tall vase to catch the drips.
Part 2 : Making Apple Jelly
Ingredients
120-200gm sugar for every 1 cup of juice
juice from 1 lemon
Method
1. Into a thick base pot add 6-7 cups of the strained apple juice, sugar and lemon juice.
2. Boil on medium heat and stir until the sugar is dissolved.
3. Turn the heat up and bring to a rapid boil for about 15-20 minutes or until the mix reach setting point*. Give it an occassional stir and scoop up any floating scum.
4. The jelly might look a bit watery but will set beautifully when cold. Do not overcook. Soft jelly taste better.
5. Pour into sterilised jars, seal, label and store in a cool place or into jelly moulds.

Note :
The standard measure of strained juice to sugar is 1 cup juice = 200 gm sugar.
After 5 trials with varying degrees of sweetness, my preferred level of sweetness is 120gm to 1 cup juice. As our tastebuds will vary, do taste the jelly during the cooking process and add more sugar if you find it not sweet enough. The sweetness of the jelly is also dependent on how sweet or tart your apples are.
Do not use tart apples like granny smith.
Tip
1. Do not be tempted to double the recipe as it will then take too long to thicken and set.
2. If you are using pop-top jars, make sure the jars 'pop' when cooled. If they have not popped down, it means the jar is not sealed. Keep unpopped jars in the fridge and consume those first.
Sterilising jars
To sterilise the preserving jars wash them in hot soapy water. Remove and put the glass jars into an oven at 120°C for 15 minutes or until the jars are required. Place the lids in a pot of hot boiling water. Do not at any stage dry the jars with a tea towel.
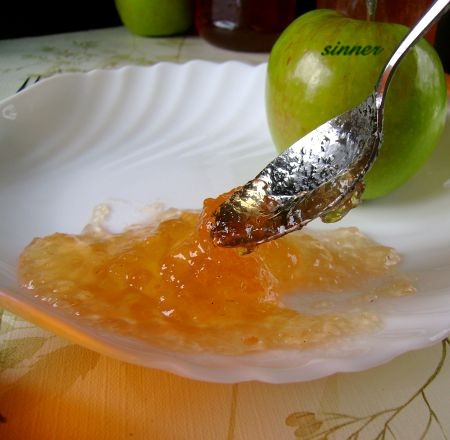
Setting Point Test
Place saucer in freezer to chill. To test for the setting point of jam, place a teaspoonful of jam on the chilled saucer. A skin will form on the surface and the jam will wrinkle when pushed with your finger when setting point is reached.


1 Comment:
Such an interesting recipe! Any chance you want to take part in a jam (or jelly) exchange? I’m hosting one this month over at my blog :) http://stephchows.blogspot.com/2009/07/jam-exchange.html
Post a Comment